So, you’ve just installed or upgraded to Windows 11 and you’re thinking to yourself, what should I do now to improve overall experience after Installing Windows 11? I’ll show you the things you should do after installing Windows 11 to make it work better for you.
Let’s get started.
Most Ways to Make Your PC Faster After Installing Windows 11
Check for Latest Updates
First, you should check to see if there are any updates After Installing Windows 11. There could be updates that include new features, bug fixes, or updates to your drivers to make them more compatible After Installing Windows 11.
To check for updates, let’s open the Settings app. One of the many ways to open it is to right click the Start Menu icon. And select settings.
In the tabs on the left go all the way down and select Windows Update.
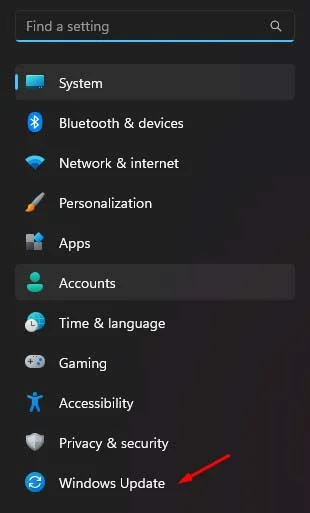
If you see that there’s an update available, click download and install. If not, click on check for updates to scan for latest updates.
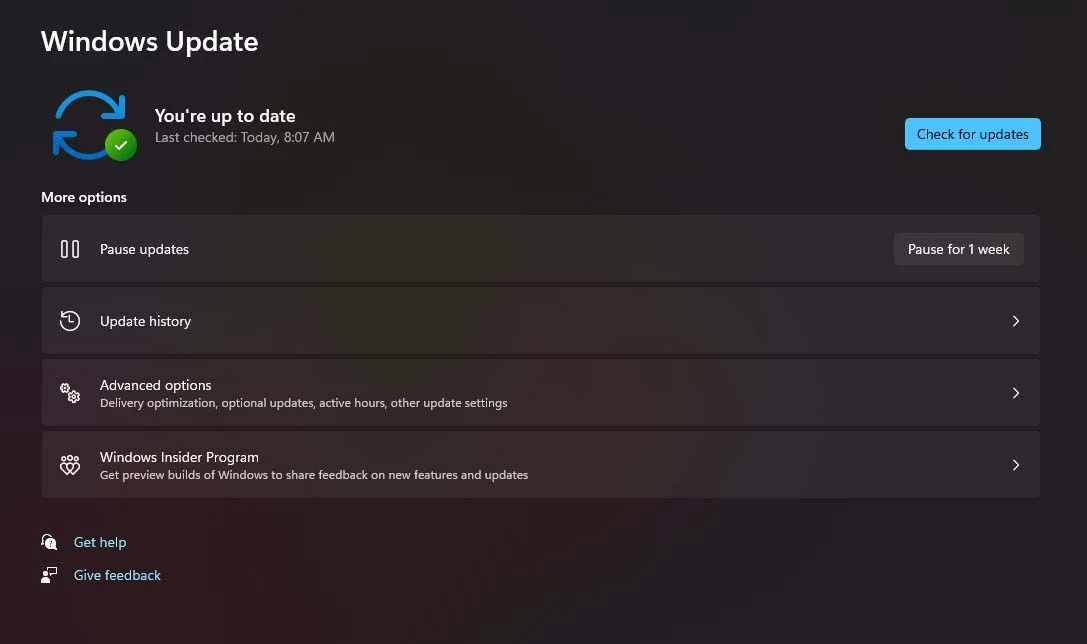
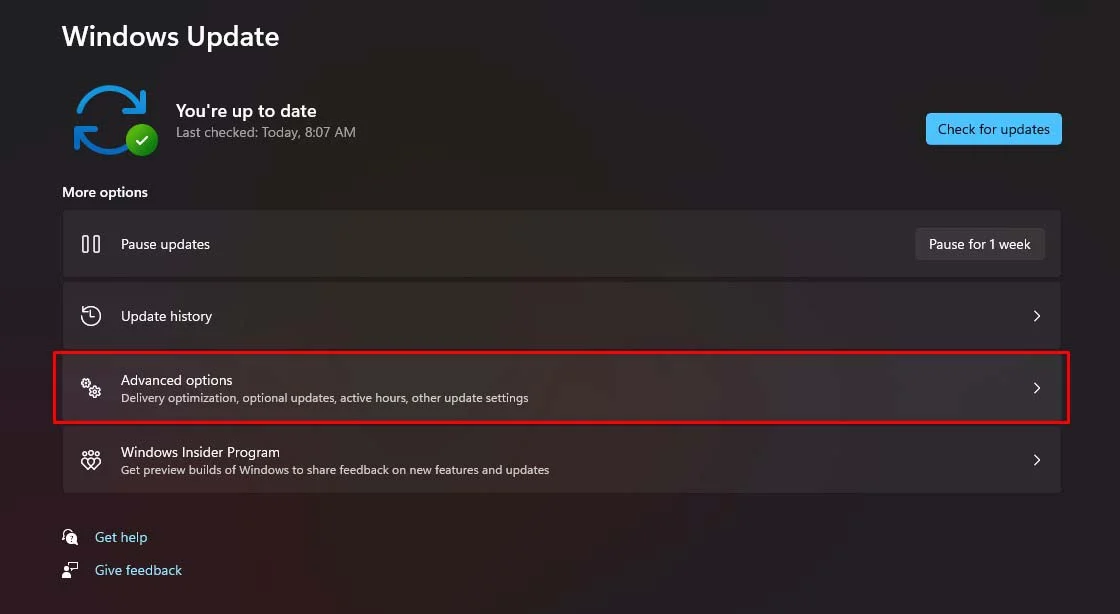
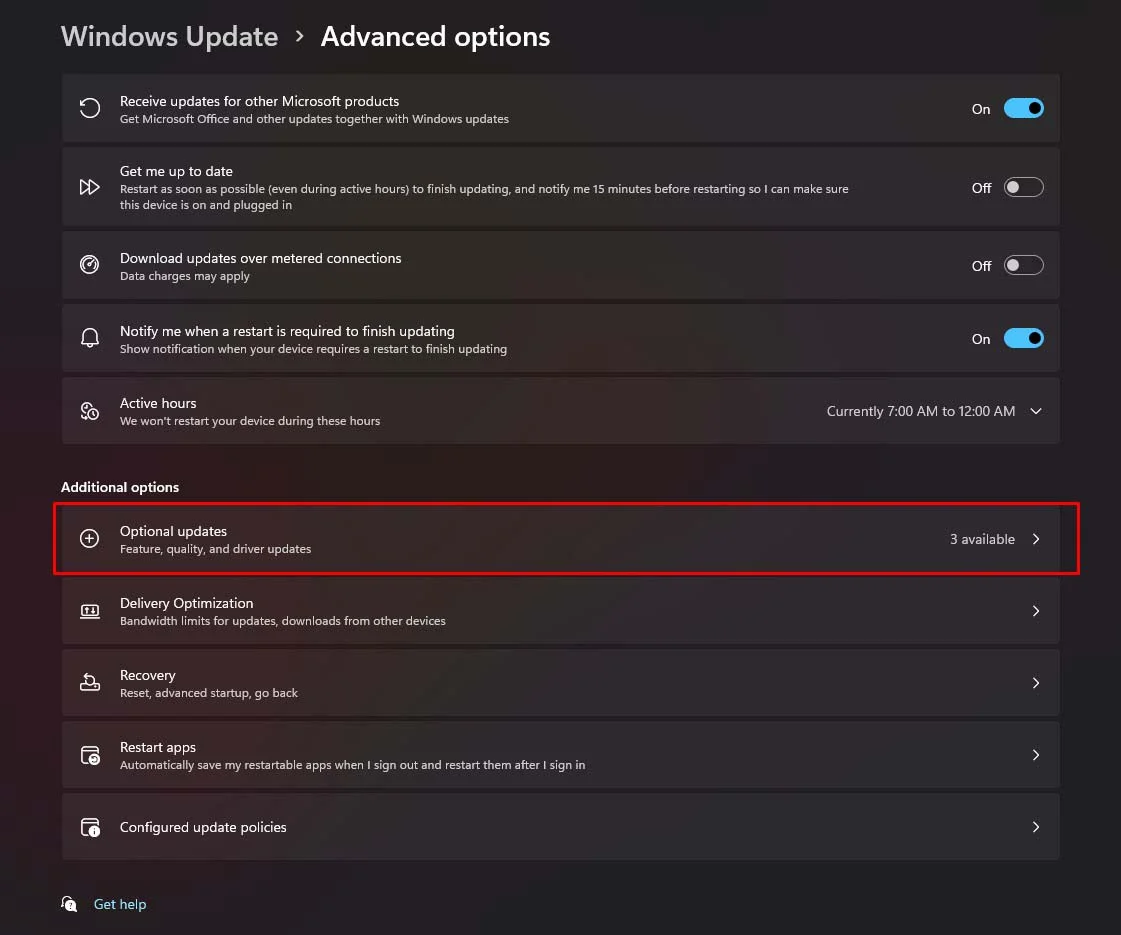
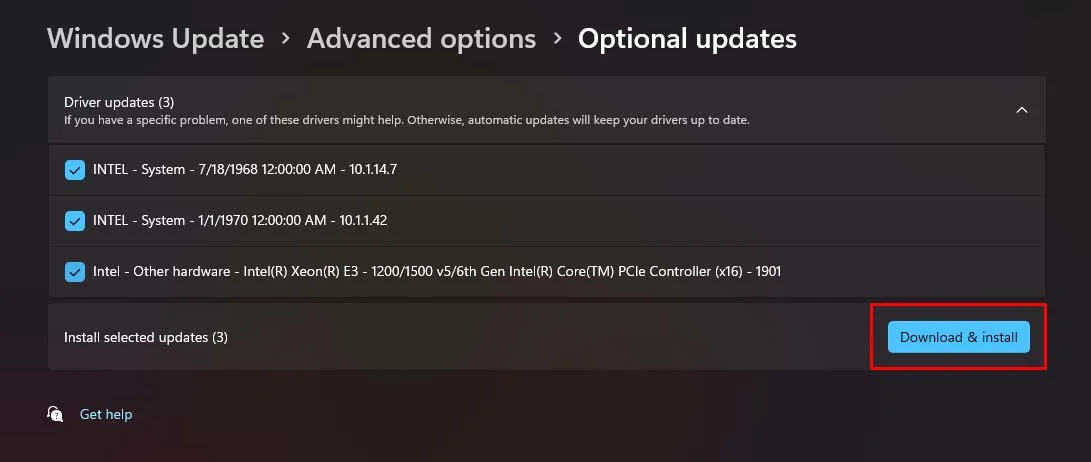
In addition, you may have optional updates to install that could make things better. Microsoft doesn’t make this obvious. No surprise, so I’ll show you how to find them. Go to advanced options. In additional options, select optional updates. If there are any available, click to check them and then select download and install.
Optimize Startup Apps
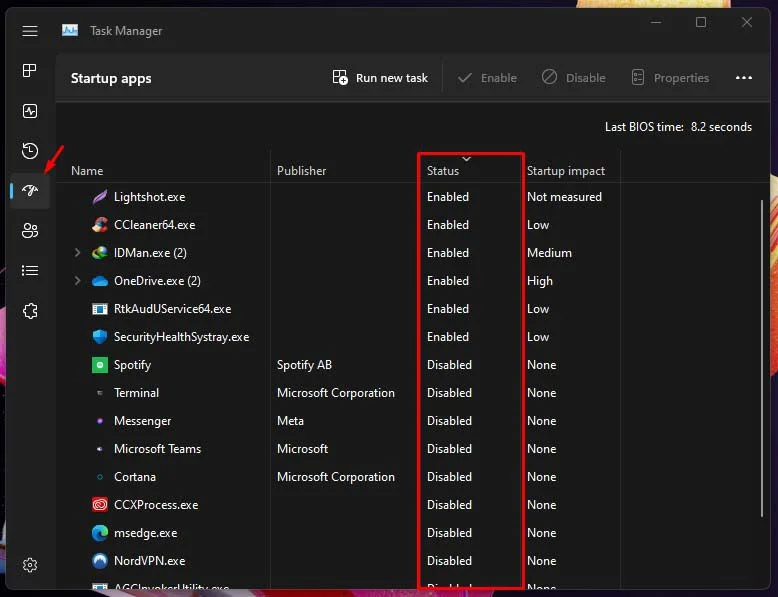
After Installing Windows 11, Microsoft assumes that you may want all their services to load at startup, which could end up slowing down your boot time. To disable the Microsoft services, you don’t use it start up right click the Start Menu icon and select task manager. At the top, select the startup tab.
Services in this list owned by Microsoft that you may find enabled include Microsoft Todo teams, Skype, Xbox App Services, Cortana, and one drive for each service.
You don’t use that you don’t want enabled at startup, select it and then click disable. Here in the lower right and repeat the steps for each service you don’t use.
Delete Junk and Old Windows Files
After Installing Windows 11 from Windows 10 or just You upgrade from Windows 10 to 11, the old files from Windows 10 that are no longer needed are still on your drive, taking up space. Just in case you want to roll back to Windows 10 if you’re happy with Windows 11 and want to delete those old files.
Tip: You can use CCleaner to clean your PC in an extremely fast and efficient way.
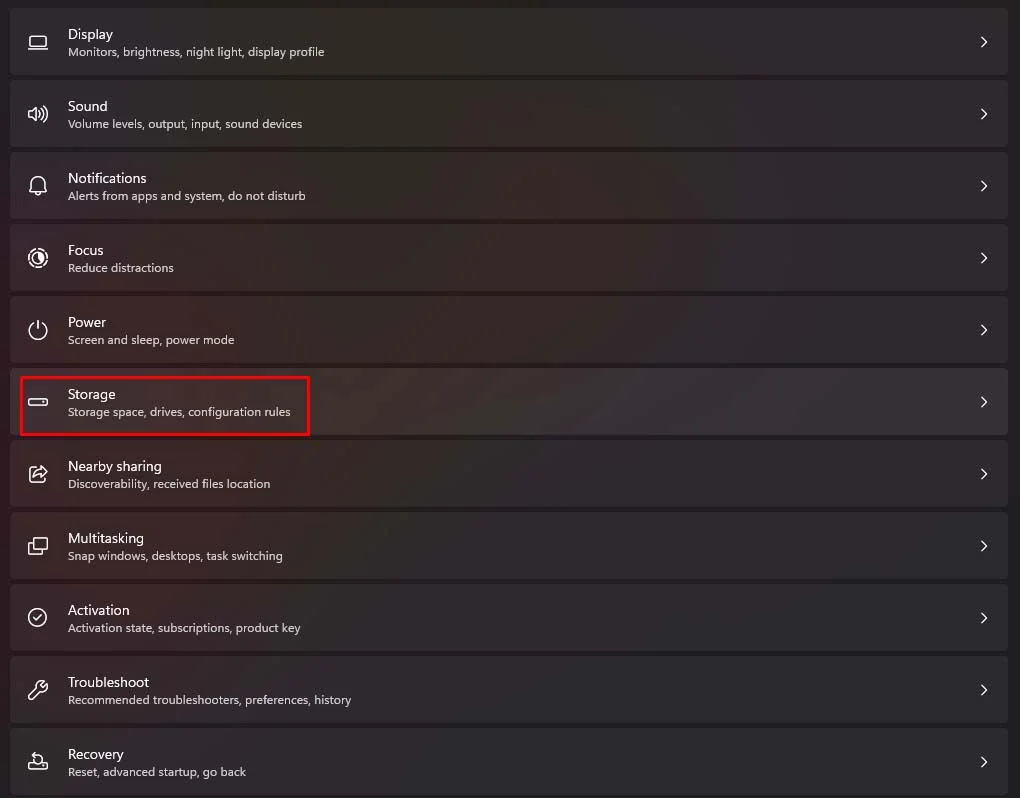
Open settings app. In system go to storage. In storage management, select cleanup recommendations. If not already open, click temporary files in addition to downloads and recycle bin.
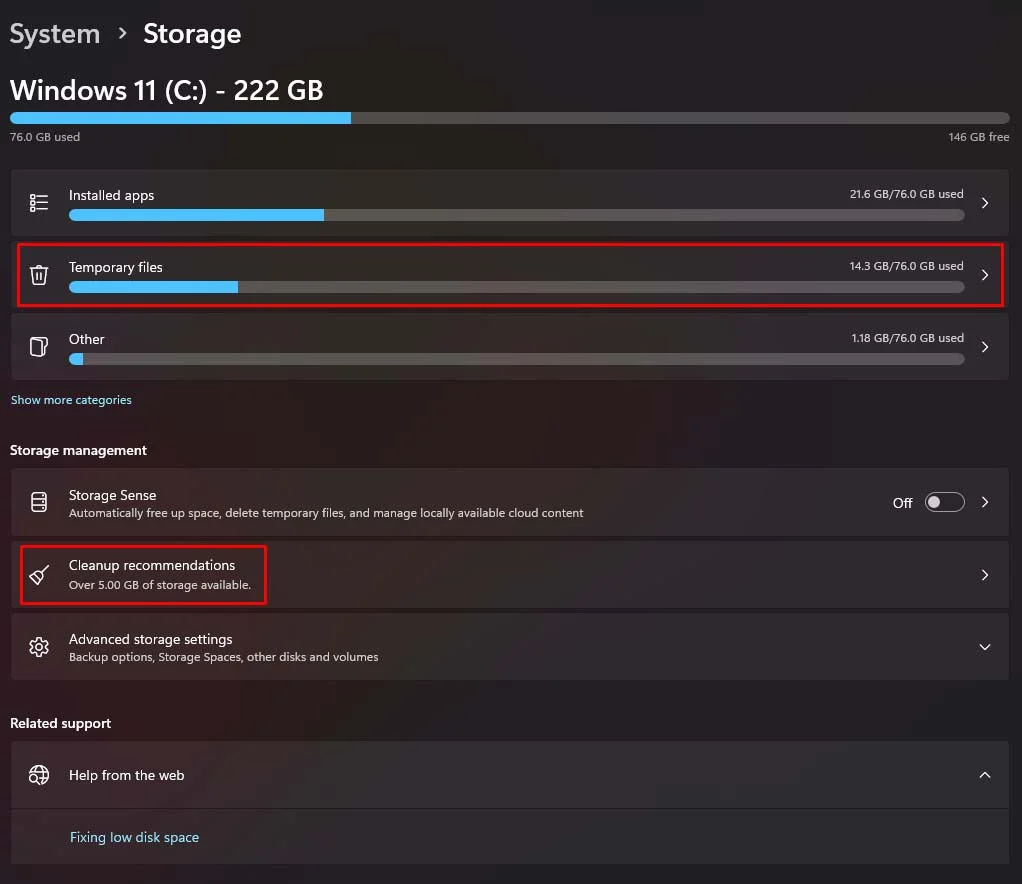
You should also see another listing called previous Windows installation. I’ve already deleted it so it’s no longer here, so if you see previous Windows installation, put a check mark next to it along with the other files you no longer need. And click on cleanup to get rid of those files. Click on continue and wait for it to finish.
Review Privacy Settings
If you’ve upgraded from Windows 10 to 11, your privacy settings should have transferred over. If you’re using a fresh install of Windows 11, you might want to change some of these.
Let’s open these settings app. In the left pane, select privacy and security. In Windows permissions, go to general. If you value privacy, it’s best to turn all of these off.
Let’s go back.
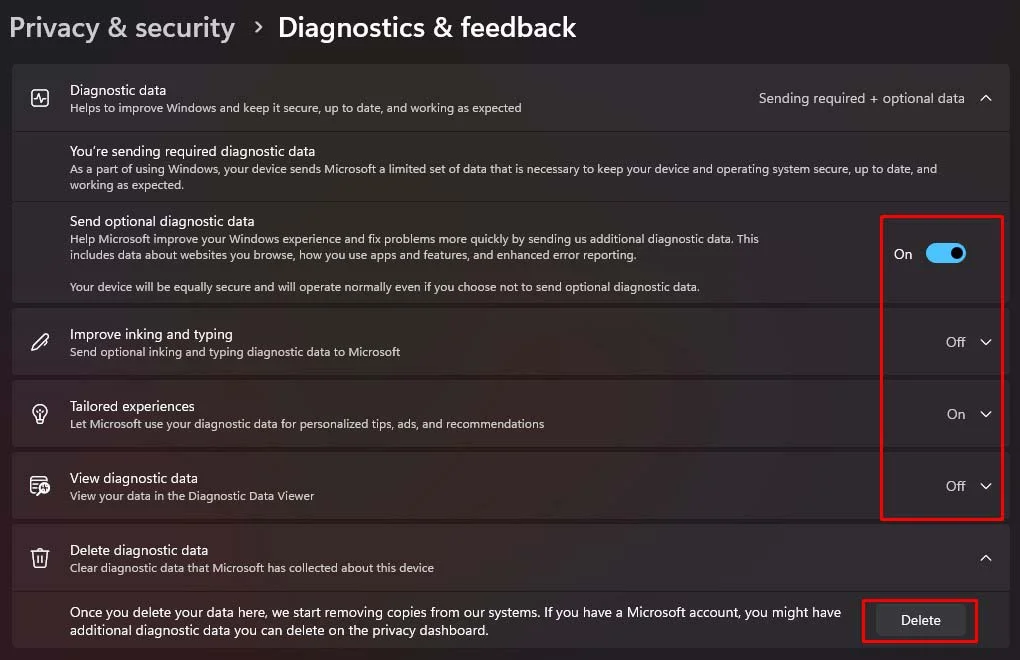
Also, Windows permissions go to diagnostics and feedback. For said optional diagnostic data, toggle the switch to off.
In addition, go to improve inking and typing tailored experiences and view diagnostic data and switch the toggle for each of these two off. When you’re done with that, go to delete diagnostic data and click on delete.
Choose Perfect Power Plan
Another thing to check out is your power plan After Installing Windows 11. Check your power plan. Go to search and type control panel. Select it. In view by select large icons. Click on power options.
Currently, the control panel is still more detailed than using the settings app to choose a power plan. Currently it’s set to balanced depending on the manufacturer of your PC, you might have different choices than me.
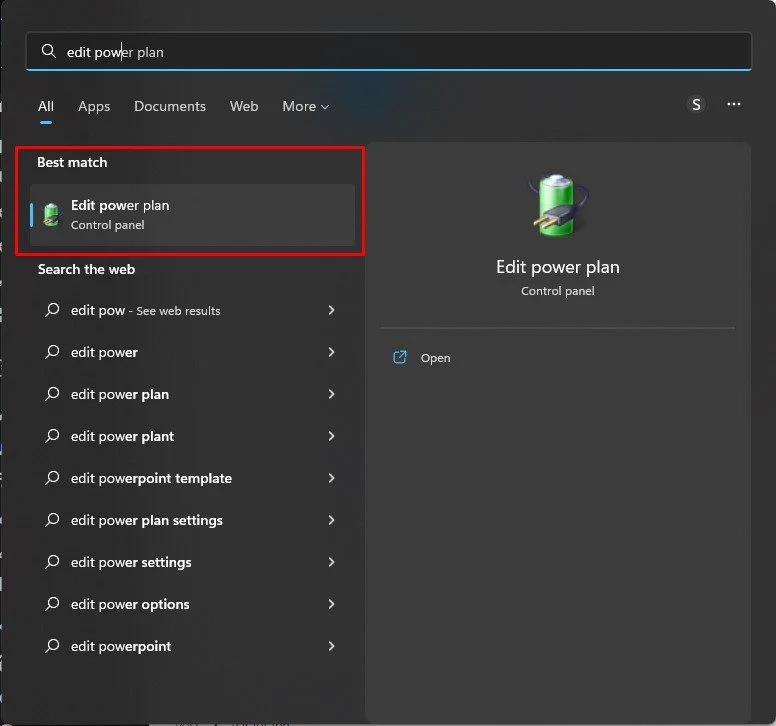
If you’re a gamer or edit videos, high performance would be better for you. And if you have a higher end PC, you might also want to choose ultimate performance, but if the extent of what? You do on your computers looking at cat pictures and videos, Power Saver just might be the best power plan for you.
Thanks for reading this guide. If this article is useful for you, give it some love and share with others one of the first things, you do after installing windows 11.
Let us know about those in the comments, and if you’re new to our blog, subscribe our newsletter to stay up to date with the latest with Windows 11, another tech related stuff here.

