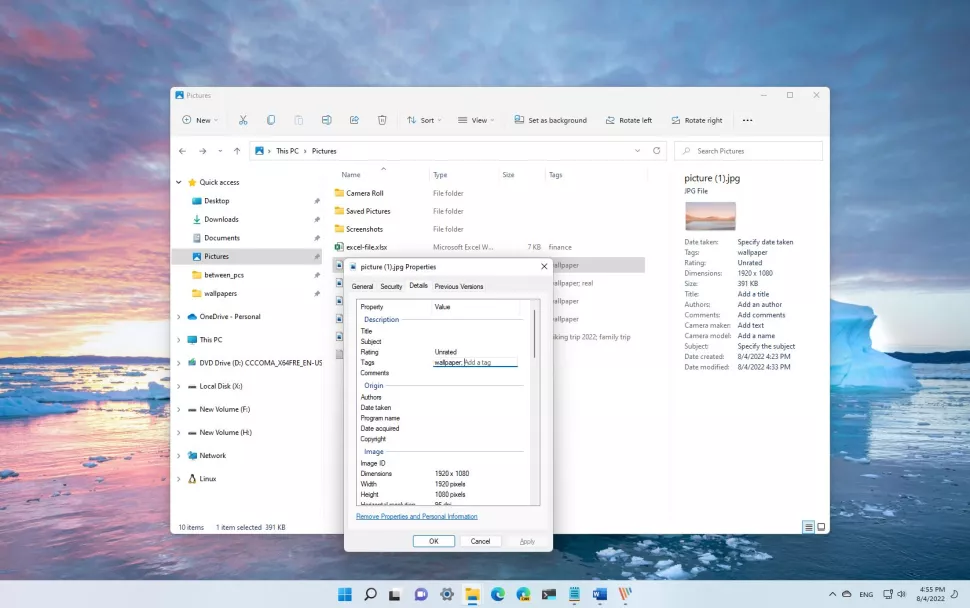
With Windows 11, the search function makes it easy to find almost any kind of file on your computer. But if you have a lot of documents and pictures, you can use tags to make it easier to find files by keyword.
How to easily Add File Tags in Windows 11
Tags are not new, they have been around for a long time. However, because they have to be added manually, not many people know about them or know how to use them.
In a nutshell, tags are words that describe what the file is about. This information is saved as part of the file’s metadata. Then, when you need the file, you can search by the tag information instead of the file name, which you might not remember.
For example, you could use the following tags for a picture of you and your dog with mountains in the background: dog, dog’s name, your name, mountain, and the name of the place.
Must check: Top 10 YouTube Channel Ideas in 2022 – Best YouTube Channel Ideas
If you can’t remember the name of the file the next time you need it, you can search the tag to find, in this case, a specific picture.
In the same way, you can put the same tag on multiple files so that a simple keyword search will find all of them. This guide will show you how to use tags on Windows 11 step by step.
HOW TO GIVE FILES TAGS IN WINDOWS 11
On Windows 11, there are at least two ways to give files tags in Windows 11. File Explorer and the Microsoft Office apps can be used.
File Explorer Properties settings:
Follow these steps to add tags to a file through the Properties setting:
- Open File Explorer.
- Go to the folder where the files you want to tag are.
- Right-click the file and choose “Properties” from the menu that appears.
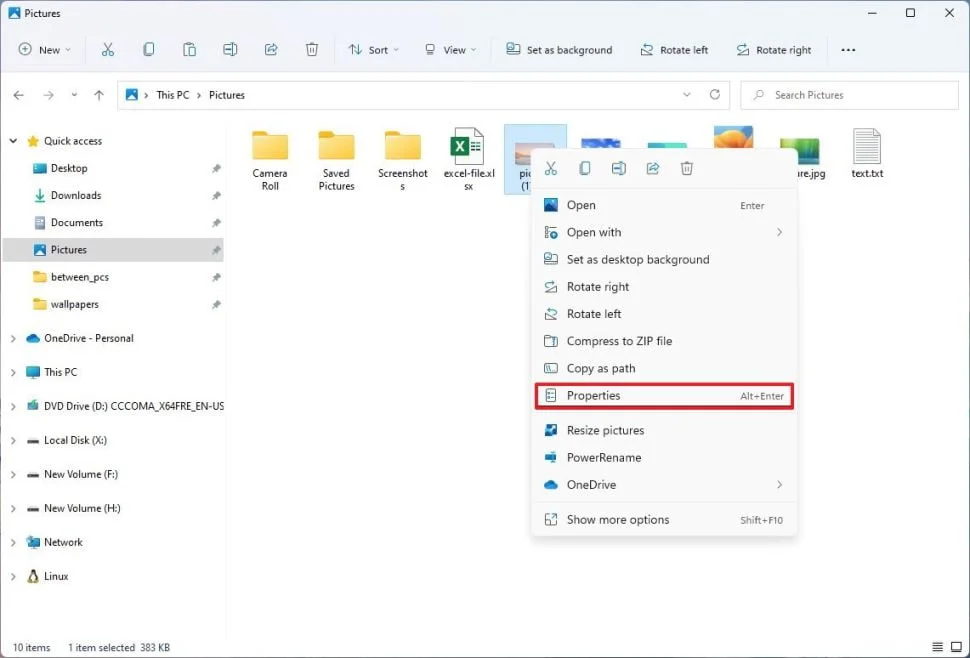
Tip: To tag more than one file at once, you can also select more than one file, right-click the selection, and choose Properties.
Click on the tab for Details.
Click on “Tags” and confirm the keywords that are followed by a semicolon. For example, “hiking trip 2022,” “family trip,” etc.
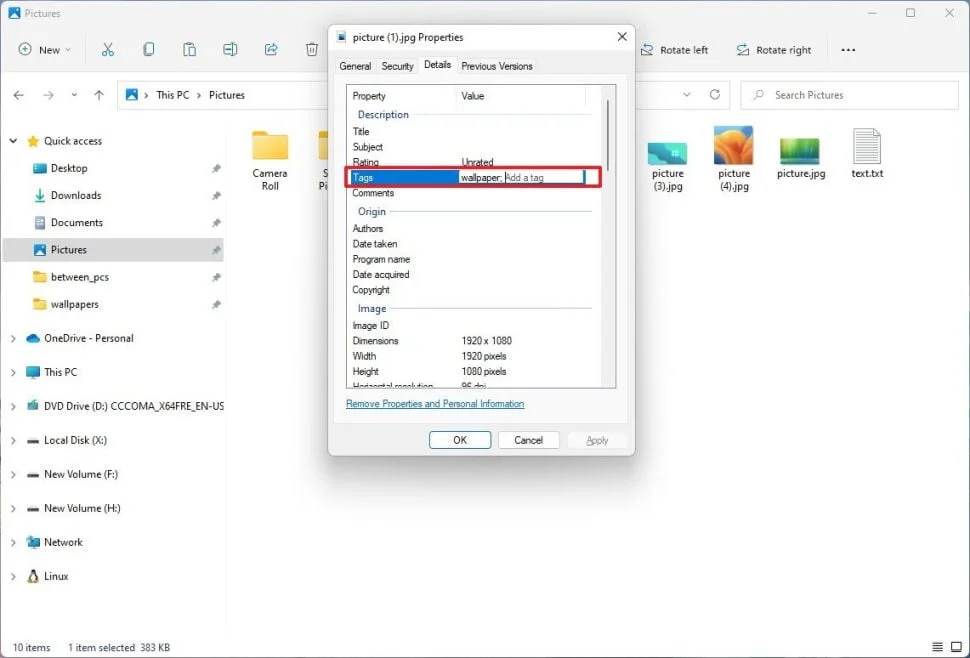
- Click the button that says “Apply.”
- Hit the “OK” button.
As soon as you finish the steps, the keywords will be saved to the files you chose.
File Explorer Details pane
Follow these steps to tag files in File Explorer’s Details pane:
- Open File Explorer.
- Go to the folder where the files you want to tag are.
- Select Show from the View menu, then click the Details pane option.
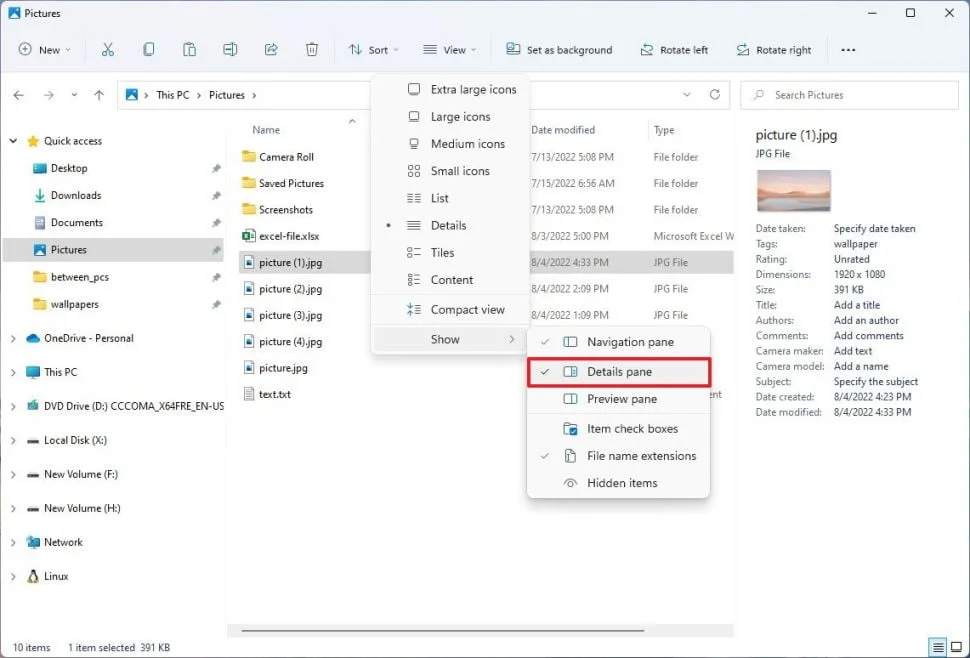
- Choose the file you want to add tags to.
- Click “Tags” and make sure the keyboard and keyphrase are followed by a semicolon. For example, “hiking trip 2022,” “family trip,” etc.
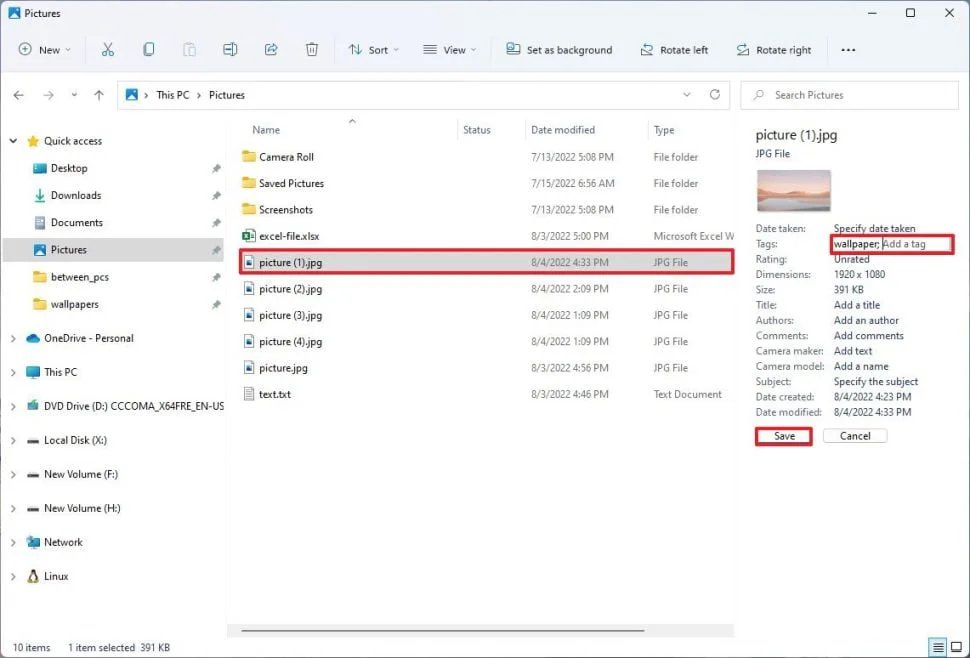
Note: You can tag more than one file at once by selecting the files you want to group together with the same tag. Also, as you type the tag, you can choose it from a list if it has already been used.
- Click the button Save.
After you finish the steps, the tag will be saved in the file’s metadata, and the file should now be able to be searched.
Office tools (APPS)
Follow these steps to add tags to an Office file, spreadsheet, or presentation:
- Start up Microsoft Word (or another app).
- Select File.
- Select Save As.
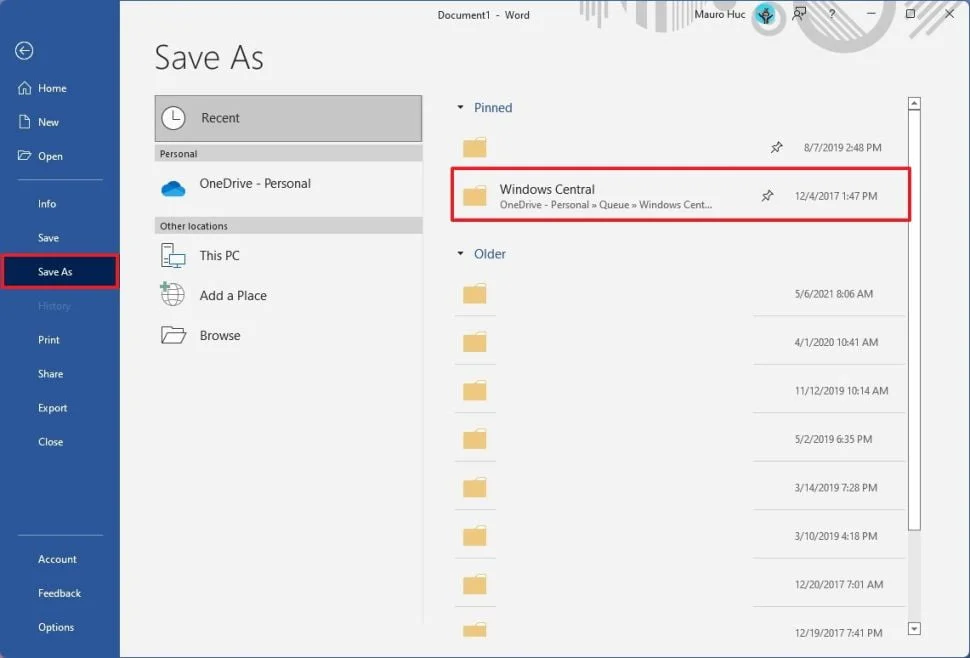
- Choose where to Save the File.
- Click “Tags” and make sure the keyboard and keyphrase are followed by a semicolon. For example, “hiking trip 2022,” “family trip,” etc.
- Click the button Save.
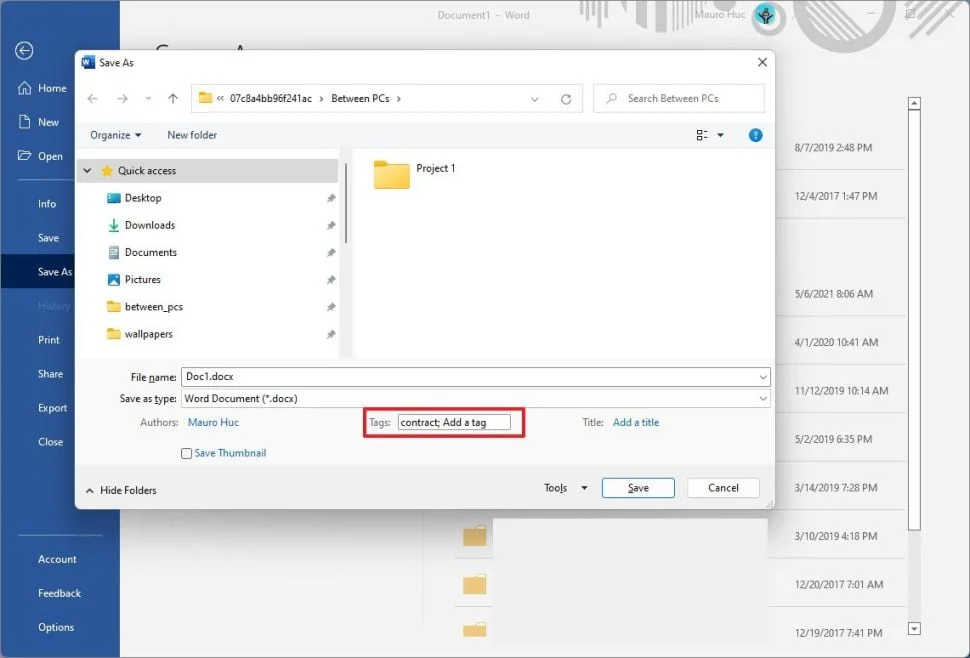
When you’re done, the file will be saved with the tags you added.

